Welcome to the Client Tools page. Here you can find resources for prepping and uploading your files, and helpful print design tips with examples.
with FTP software such as Fetch or Transmit
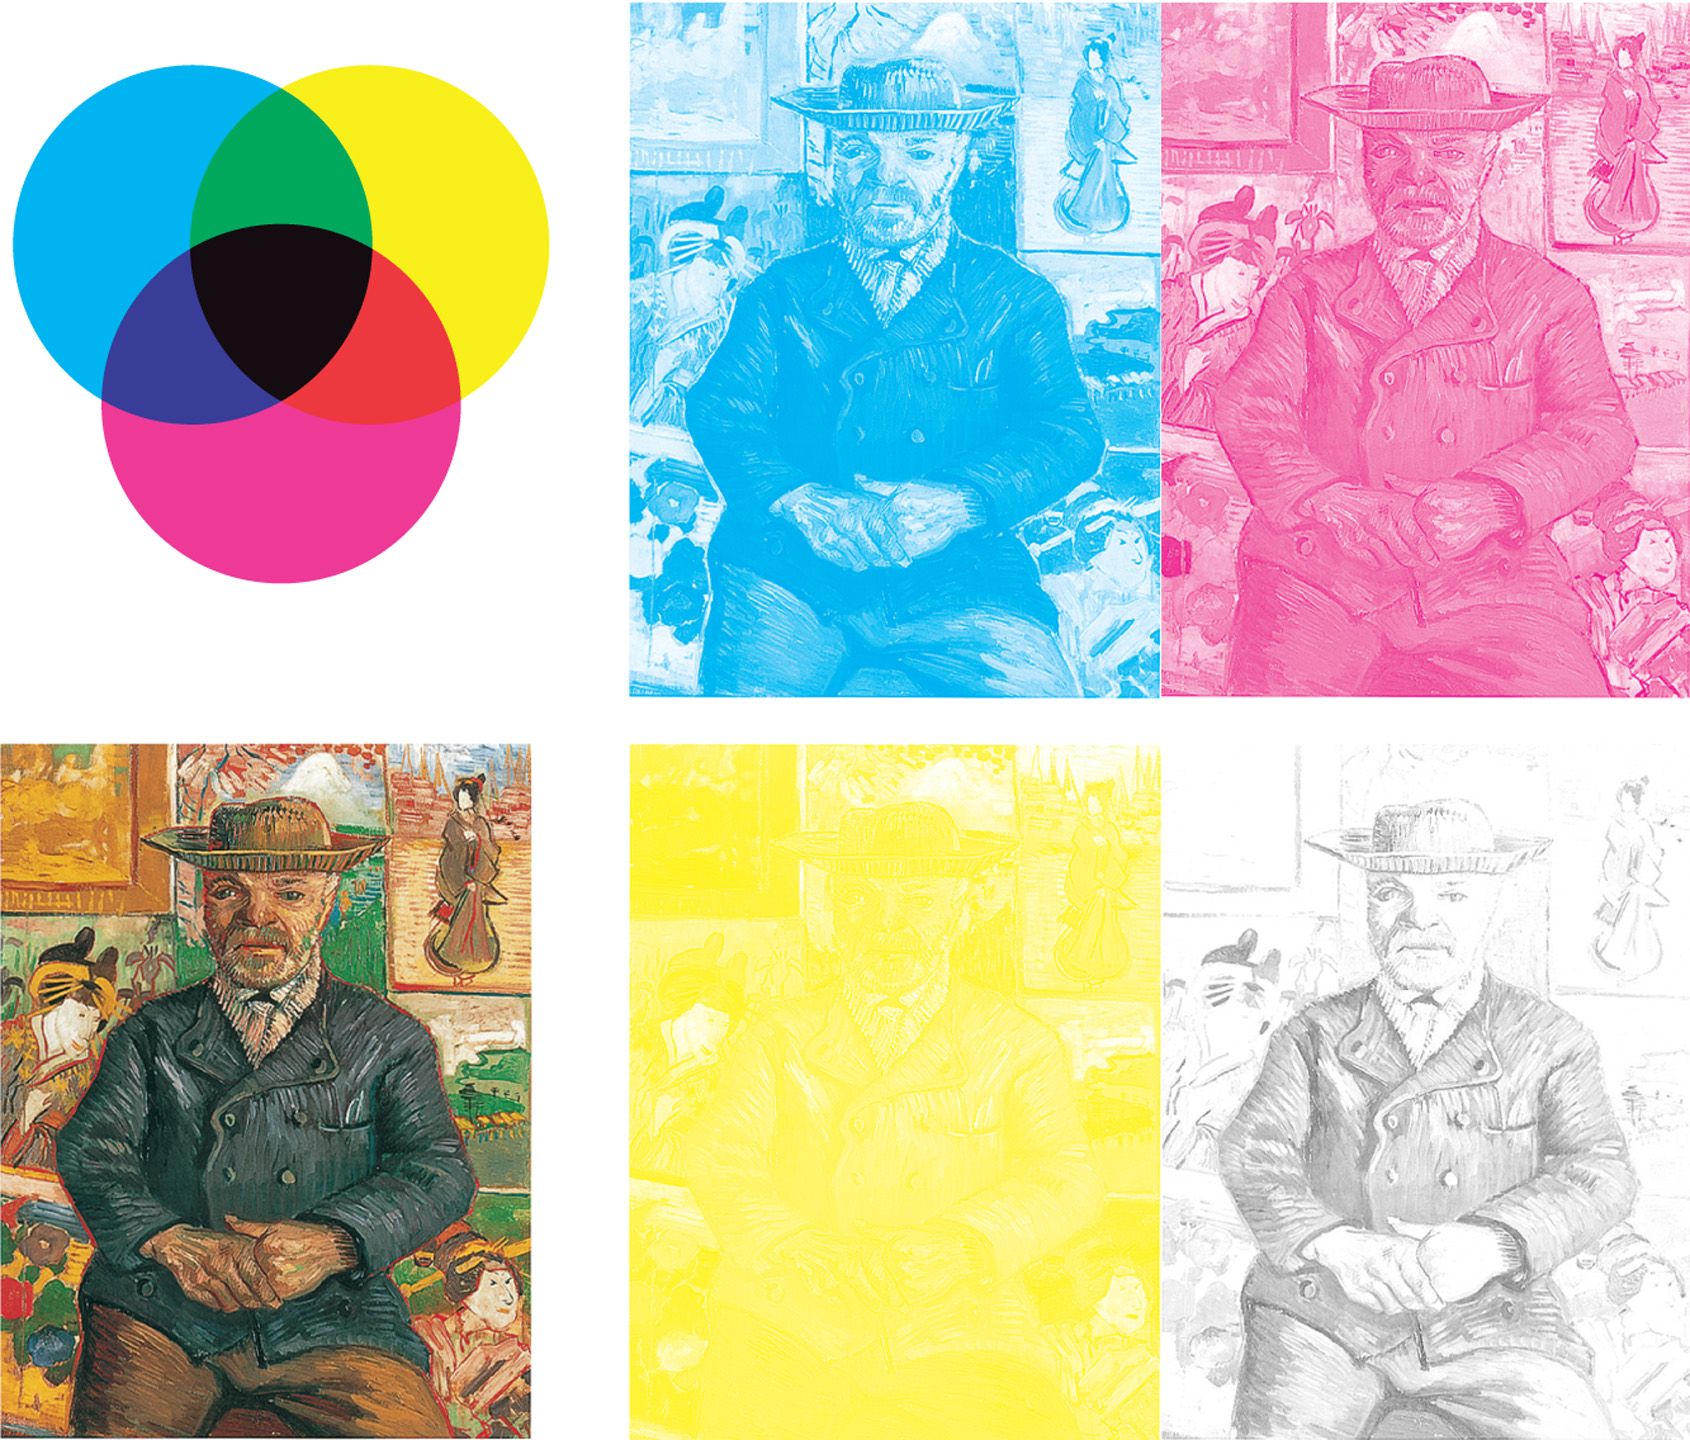
prepping files for newsprint
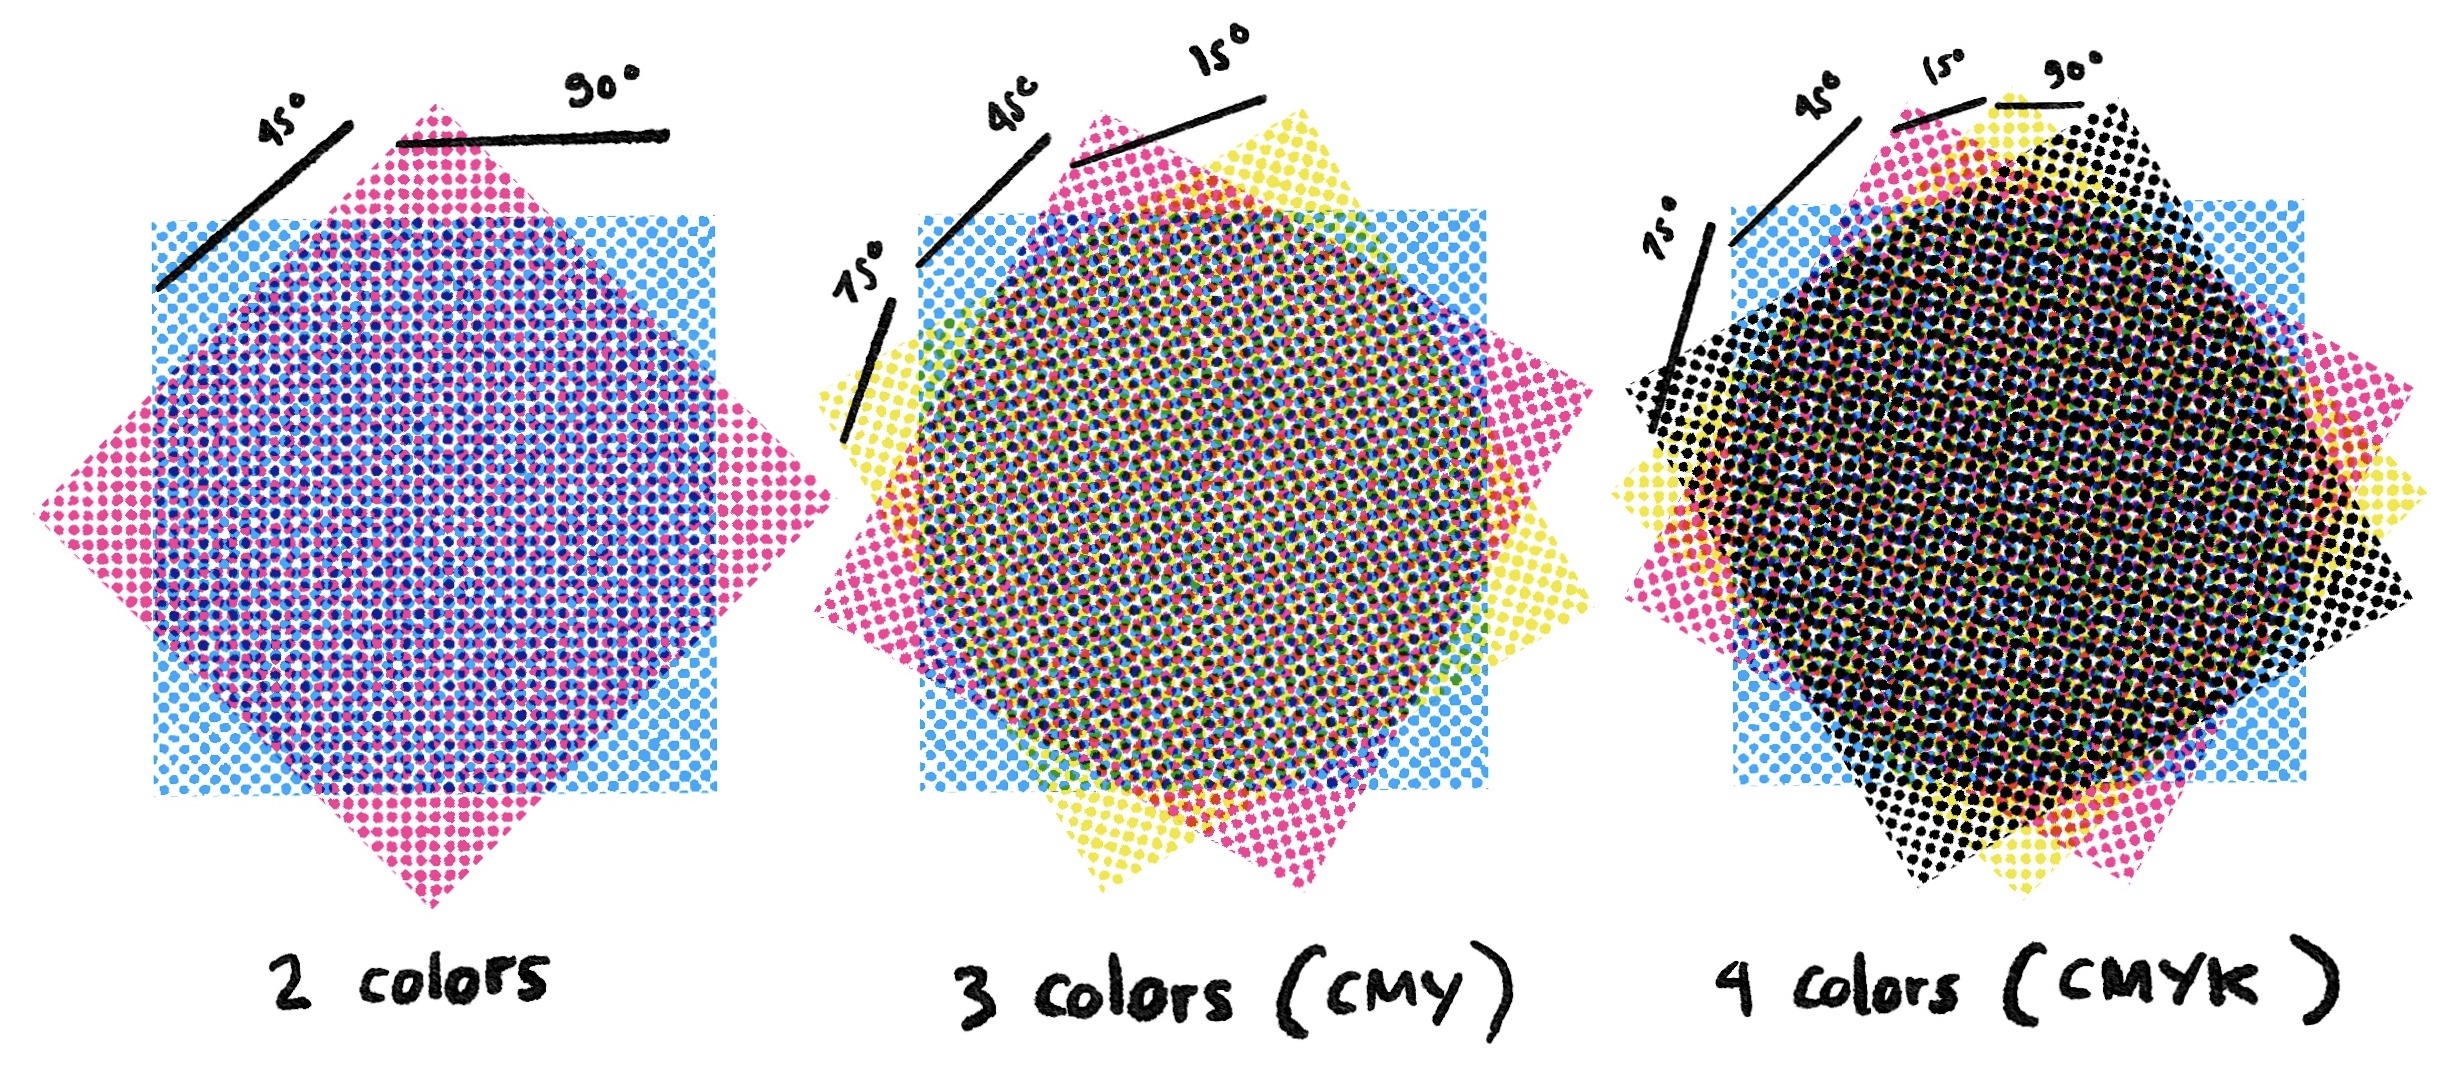
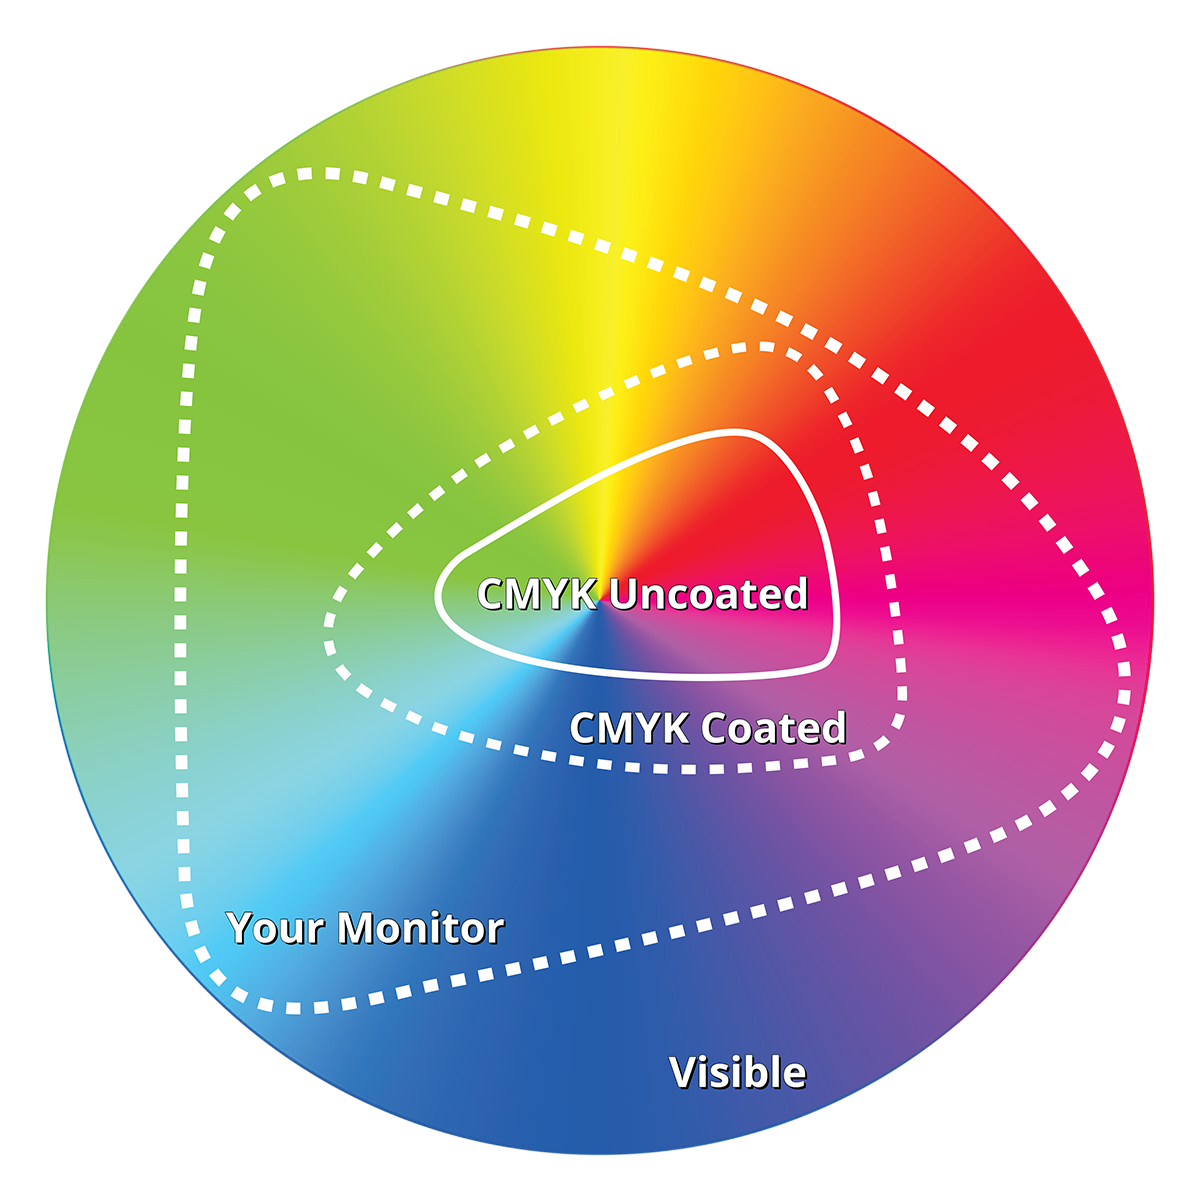
for color replication on SFNM printing presses
Mixing inks to achieve a rich black will result in fuzziness, especially when applied to text. Perfectly sharp text and details can be created by using one process color value. 100% black (k) is as crisp as you can possibly get.
This is exactly how black should be configured in your design program:
0% Cyan
0% Magenta
0% Yellow
100% Black(K)
CMYK inks are applied in layers of set patterns of tiny dots that appear to create a solid color. For this reason, it’s important to keep your total ink coverage under 260% (out of 400%).
This chart represents the entire visible color spectrum, and the limits of reproducing them with ink on uncoated and coated paper.
Why does paper type affect color vibrancy?
MATTE PAPER & NEWSPRINT: Ink is absorbed into the fibers of water-soaked paper as it passes through the press. The paper air dries, but the ink never truly does, which is why your fingers might look a little dirty after holding a newspaper. The colors will slowly fade over time, but that’s what gives newsprint its distinctive character.
GLOSSY PAPER: Ink is cured on to the surface of the paper with ultraviolet light or another heat source as it passes through each process color on the press. The ink is permanently bonded, resulting in a durable product with vibrant colors.
Questions about print design or file management?
Send them to inquiry@sfnewmexican.com
The process of transferring ink from an etched plate to a rubber sheet, known as a blanket, before being transferred onto the printed surface.
The process of printing digital-based images directly onto a variety of media substrates. Methods such as inkjet and laser are known as digital printing.
Bleed is the area of space around your final product size that will be trimmed off, usually .0125” on each edge, though that can vary. Artwork that reaches the edge of a page must extend into the bleed area even though it’s going to be trimmed off. This assures a perfect print-to-edge look.
Trim is where the edge will be cut off, resulting in the final size of your product.
The Safe Area is well inside the trim edge and marks the area where all essential elements should be within. Anything inside the safety margin is guaranteed to never get trimmed away.